Well, Chip, there’s your third option with how to deal with the spring tip pressure.
-
On bare wood or PVC. Digs holes.
-
On metal slips.
-
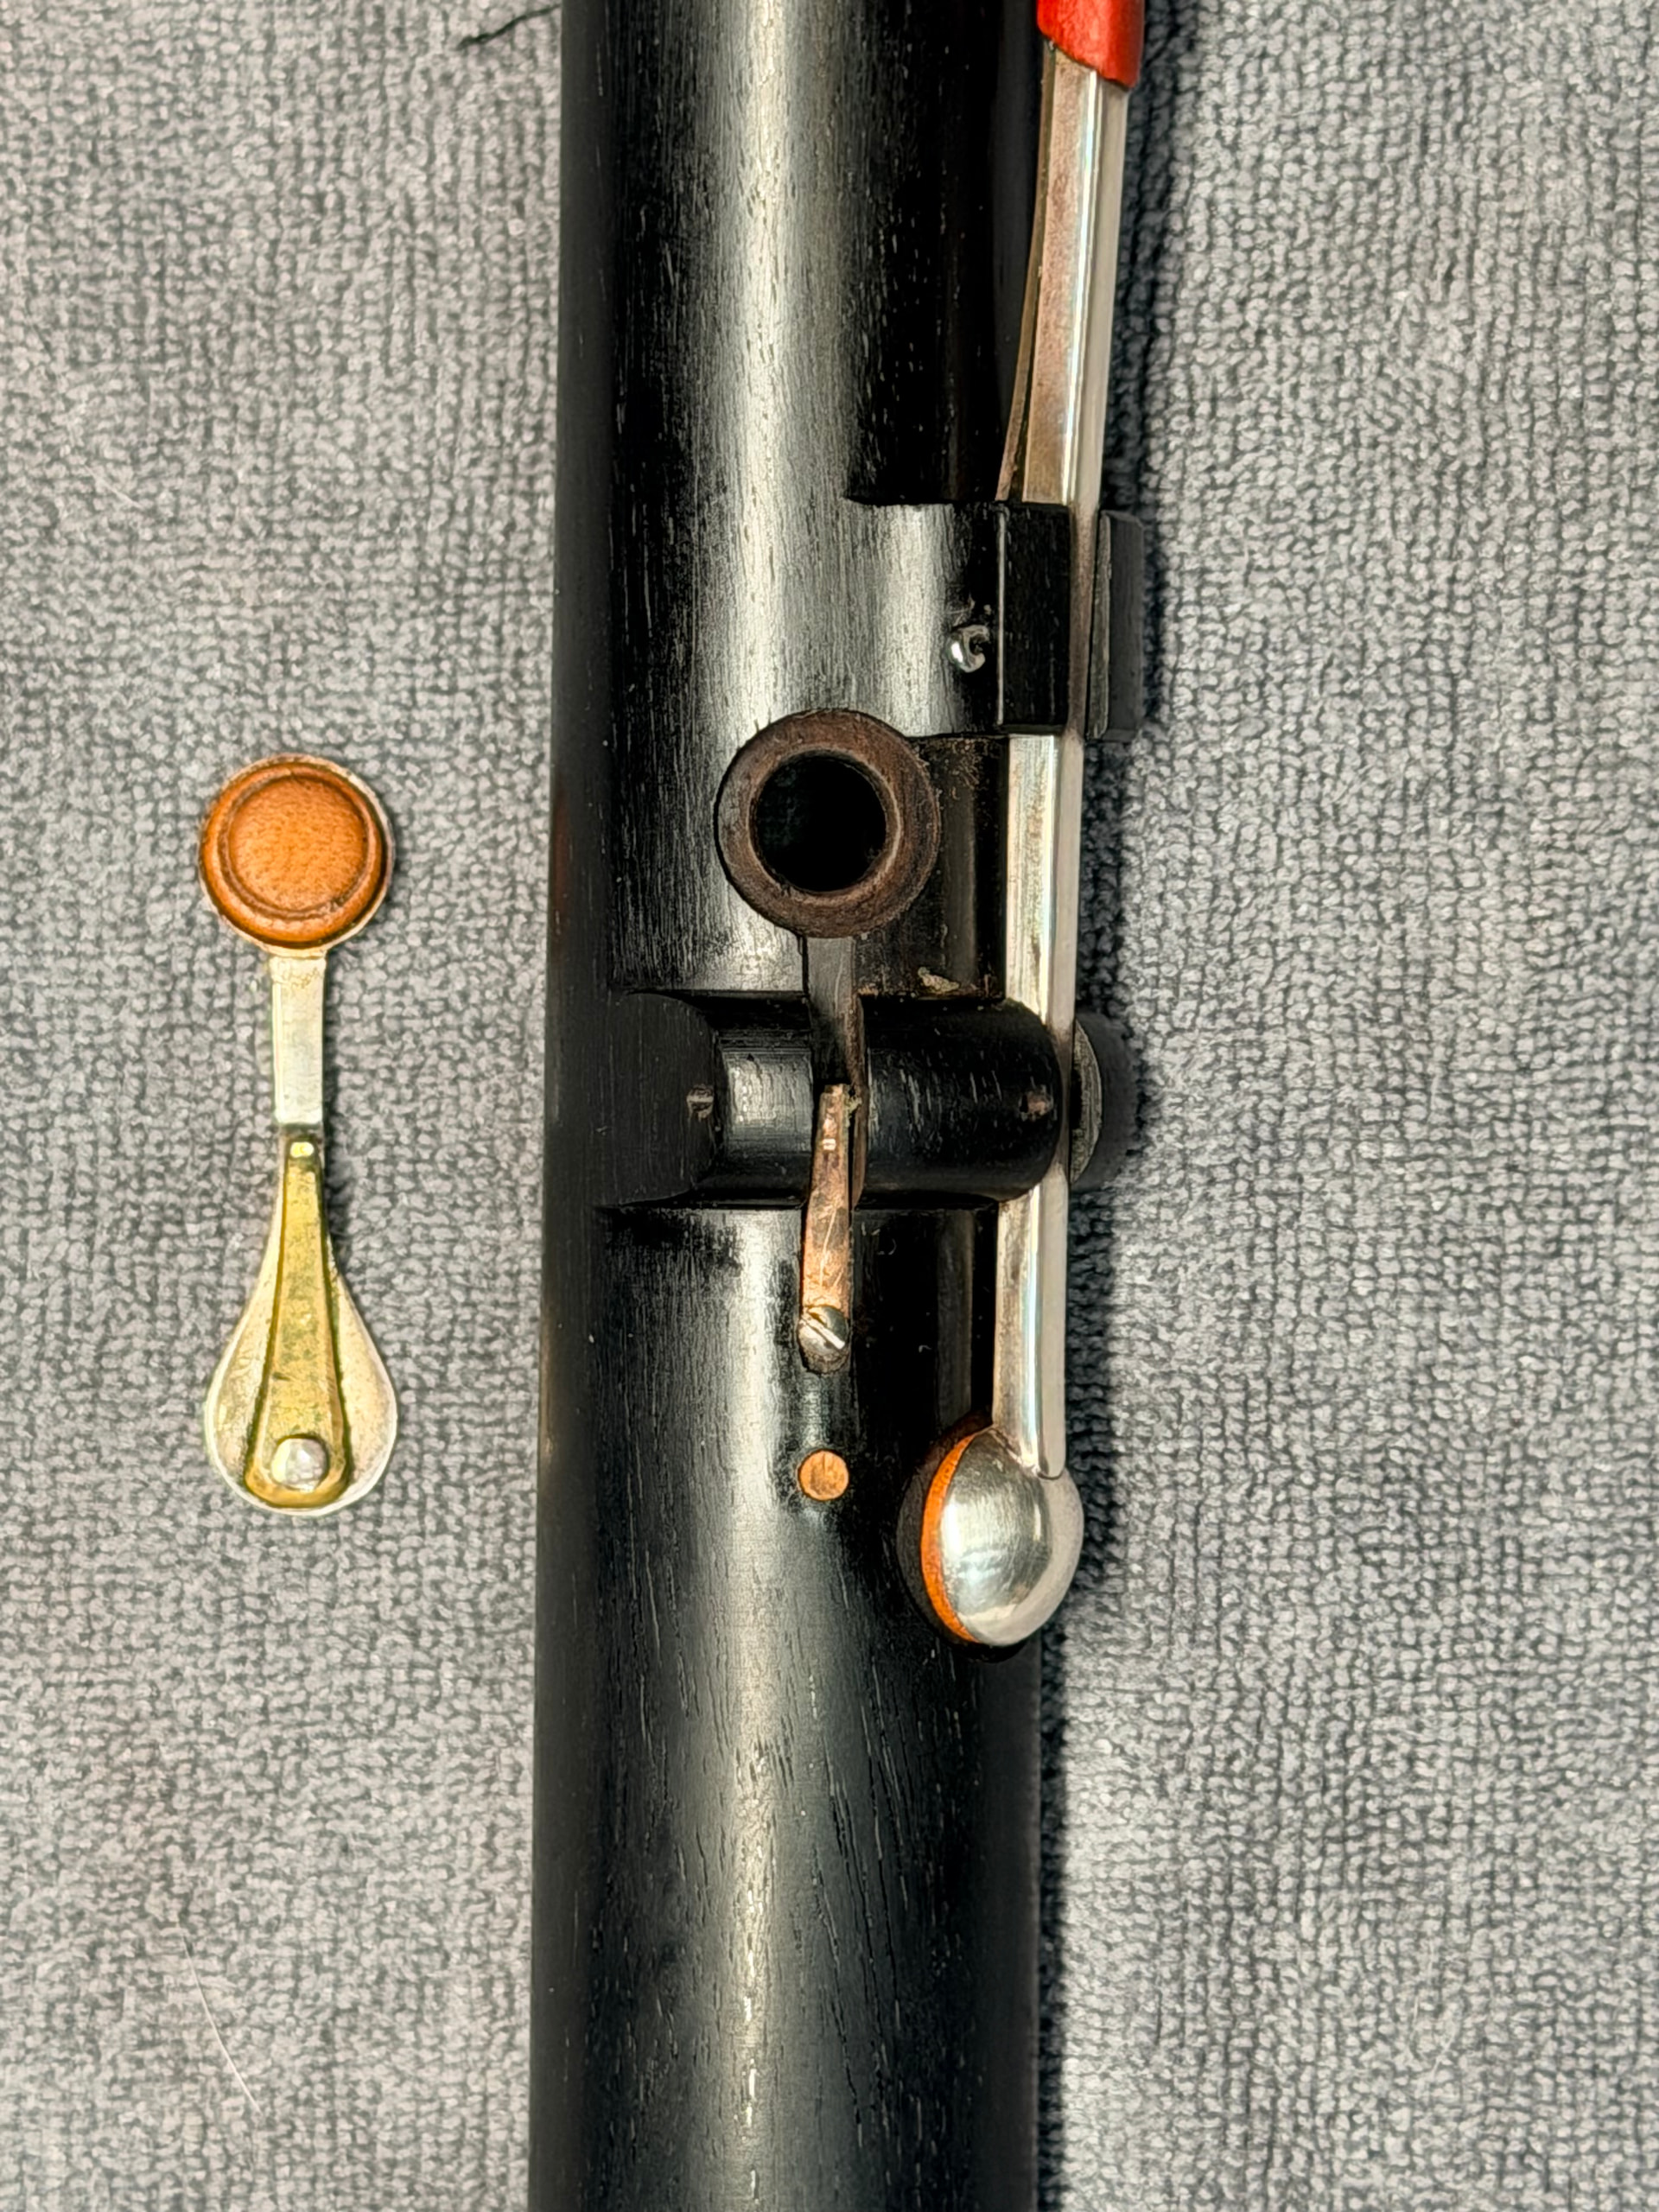
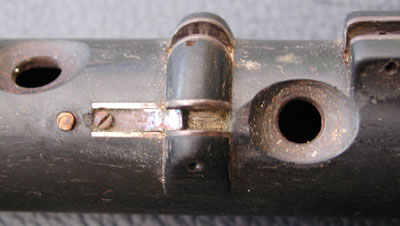
Use double springs.
I have a number of old flutes that use double springs, but they don’t seem any snappier than those using option 2. When I investigated, I found that the typically brass upper spring had overwhelmed the blued-steel lower springs and pressed it back to the wood.
One assumes they weren’t made like that, so it raises the question how has this eventuated. My guess is this.
Brass is a bit soft to make good springs, so it’s typically hammered on an anvil to “work-harden” it. So let’s imagine Mr Rose doing that and subsequently fashioning it into the sort of spring we see riveted to Andy’s Grinter key.
But then a lot of time goes by, and the brass work-hardens further, especially as each time the key is pressed it flexes the spring.
Meanwhile, the blued-steel springs we see them using back then for the lower spring don’t work-harden any further and are simply likely to get weaker, or even rust away a bit. Or in some cases I’ve seen, rust away completely!
So, that’s my guess as to why you rarely see the lower spring on period flutes sticking up much! They’ve been turned into option 2!
I often wonder how long that process takes, and if it’s inevitable. We need to watch the keys of modern makers for any sign of overwhelming.
It’s why I went for my phosphor bronze bearing on stainless steel slips approach.
Andy, Michael Grinter’s upper springs look like brass, but what do you think the lower springs are? Doesn’t look like steel in the image, but that could be deceiving. I wondered if they could be Beryllium Copper? It’s a good spring material like Phosphor Bronze, and would have the advantage of not rusting.