I thought I’d share the results of a quick experiment I just did to explore a method for making tapered staples from brass tubing. This is mostly of relevance to those of you who have a lathe and might want to take sections of commercially available brass tubing (say 4mm internal diameter and 0.5 mm wall thickness) and modify it to match some specific taper dimensions (say 4.3 mm to 4.8 mm taper, for example).
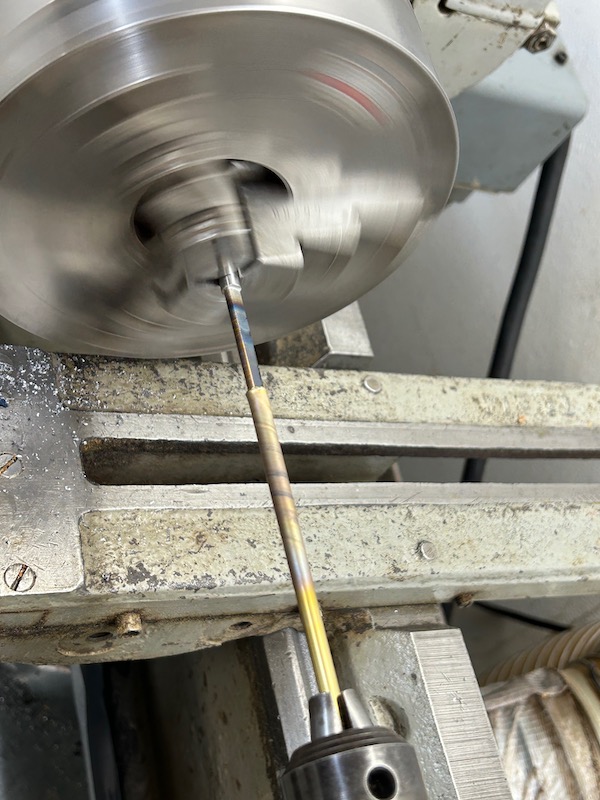
The core of the idea is to use a spin-swaging technique in which a tapered mandrel of the appropriate dimensions (and with flattened sides) is slowly forced into the slightly undersized tube while either the mandrel or the tube is spinning and the other is not. The mandrel causes the tube to oval dynamically, generating a lot of heat which anneals the brass, softening it to the point where it can stretch. As the mandrel is pushed into the oscillating brass tube the tube assumes the shape of the mandrel and keeps it once the mandrel is withdrawn. The section of tube, now tapered, can be parted off and cleaned up, and the process repeated on the next section of tube.
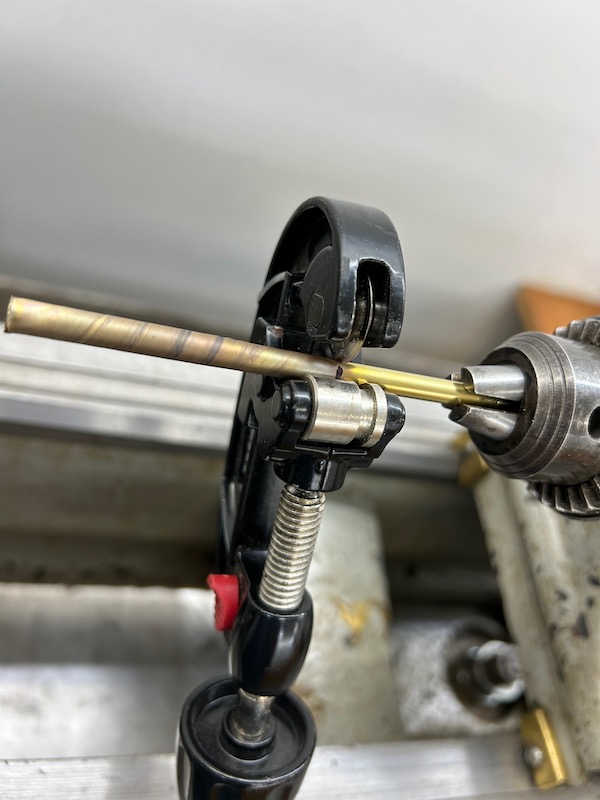
In my experiment I held the mandrel in the lathe chuck (which rotated) and I held the brass tube in a drill chuck in the tailstock (which did not rotate). I then used the tailstock hand wheel to slowly advance the tube onto the mandrel until it reached a shoulder in the mandrel which set the point at which I wanted it to stop (and effectively managed the staple length and dimensions).
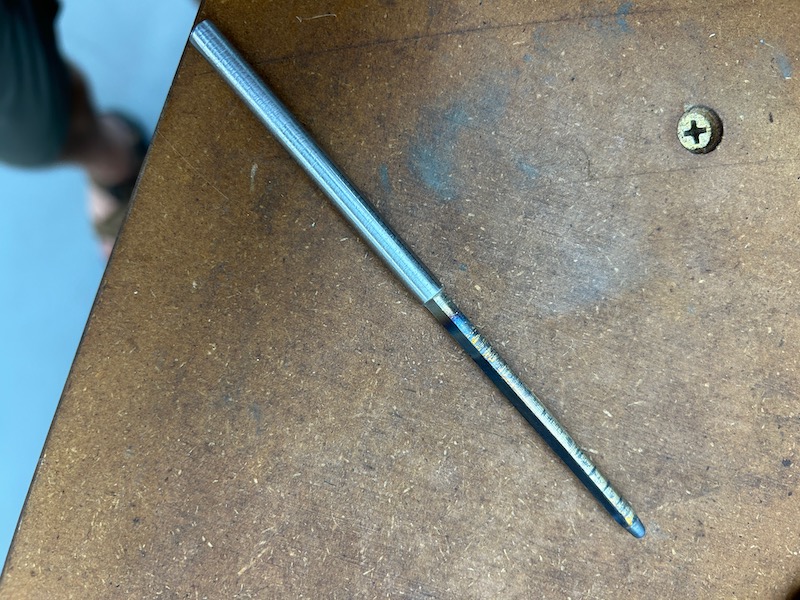
The mandrel was made from tool steel and was machined on the lathe in a manner similar to making a reamer. First I cut a conical taper of the appropriate dimensions, ensuring that the small end was smaller than the initial ID of the tube I planned to use, the large end slightly larger than the large end of the desired tapered staple, and the appropriate taper gradient and length set to match the desired staple shape.
Once the cone was cut then I filed two parallel flats on opposite sides, and made sure that the edges were rounded. The idea here is NOT for the edge to cut like a reamer, but instead for the mandrel to force the round tube into a slight oval, which since the mandrel is rotating, will rapidly move around the tube. The deflection rapidly heats and anneals the metal, to the point where you can see it change color. Here is a picture of the mandrel after use. Notice how it has blued from the heat.
It is important to advance the mandrel into the tube slowly enough to allow the brass to heat up. If you advance it too quickly the tube wall will split rather than stretch. Also, if there is too much friction between the mandrel and the brass (i.e., the mandrel was not filed thin enough) the rotating mandrel will start to drag and twist the softened brass tube. You can see this effect in the picture below. Some of the resulting tapered staples have a very obvious spiral. This was caused by my mandrel being too thick (ie, too much surface area contact).
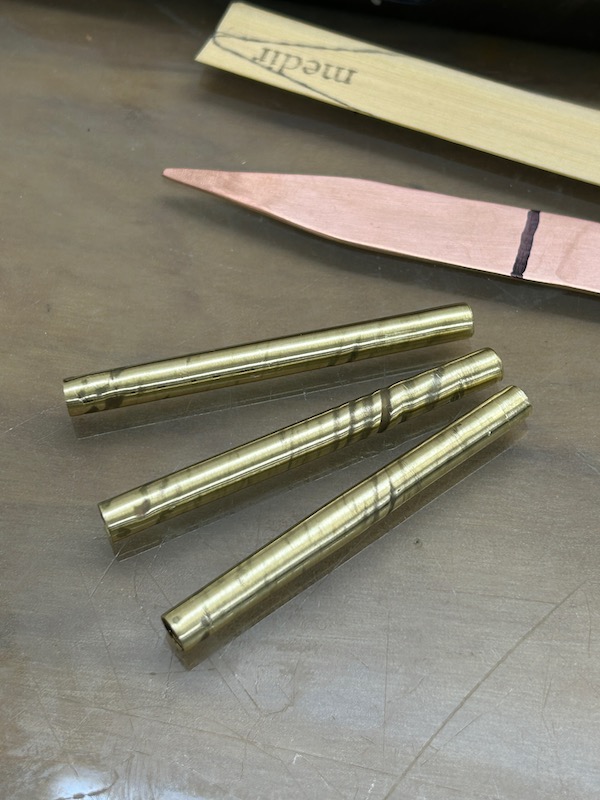
So, it is a balancing act, but once you have it dialed you can taper and part off sections quite quickly. Rather than part of the sections on the lathe, I used a hand-held pipe cutting tool. This prevents damaging the tapered staple and allows the staple to be parted off while the rest of the tube is still held in the tail stock drill chuck. I was able to mount a section of tube long enough to do three staples in one go, with very little wastage of brass tubing.
If you advance the tube to the same position along the mandrel then you get the same taper dimensions each time, at least to within less than 1/10th mm. If you initially make you tapered staples longer than needed, you can trim off the ends to clean them up. I did this on the lathe with a file.
Well, I won’t claim that this is necessarily any better (or even as good) as what you are already doing, but I think it is a technique that is worth knowing about at least. It has the potential to create quite accurately dimensioned tapered staples without a seam/joint, quite quickly. The initial investment of work to create the appropriately sized mandrel(s) is easily done in an hour or less, and is trivial compared to making a reamer.
There are limitations to how far you can push this, of course, and it is important to have a tube size that closely approximates the final staple size. I used 4 mm ID tubing with 0.5 mm wall to create staples with 4.4 mm small end and 4.9 large end. In the future intend to try using 4.5 mm ID tubing with 0.5 mm wall to make staples that taper from 4.5 to 4.9. If these work as well, I’m sure they will be easier to produce, since there will be a lot less stretching of the brass involved.
Well, there you have it. YMMV.