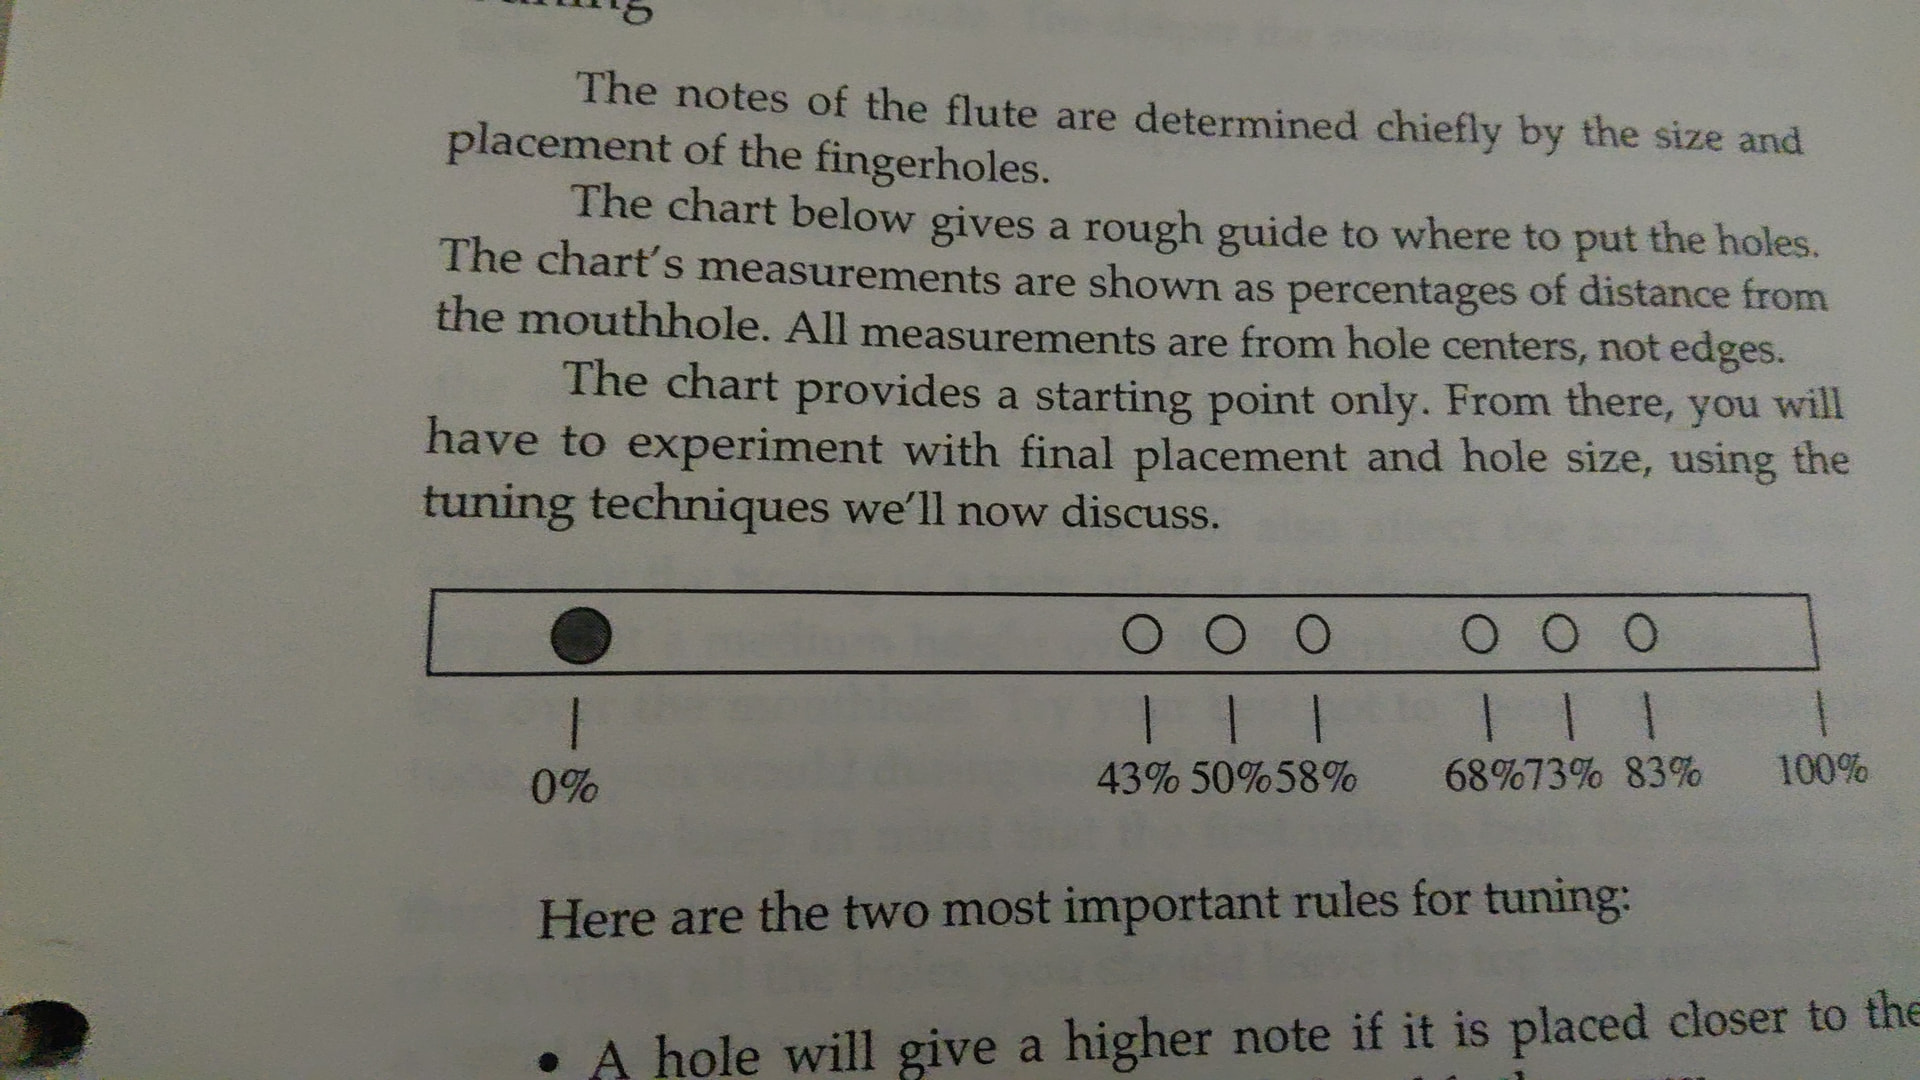
OK, I went out dug out my hand made flute making guide for bamboo, schedule 40 pvc and cpvc flutes. I’m going to try and attach an image for the first time since C&F went to its new format, so if you don’t see it…let me know. Hopefully, this image from Mark Shephard’s book will give you a rough starting point.
1 Like
The UV resin I use, Frension, is a viscous one with bad reviews, but it’s because it’s viscous that it’s so useful. You can make objects with it in a similar manner to 3D printing, building it up with little blobs and using a UV torch to stop it moving it in a few seconds. When I use it to seal things which I want to fill up with ordinary resin, the UV resin doesn’t end up in the final product as it gets cut off afterwards, but it can also be used to fill in holes in a prototype flute so that you can move them up or down the tube, or just to make them smaller if you’ve made them too big, so it’s great for doing initial flutemaking experiments to avoid wasting materials. It doesn’t stick to plastic sheet, so you can jam some in against the inside of a hole, put the UV resin in and solidify it in twenty seconds with the UV torch, then prise the plastic off. Hole gone and smooth bore restored.
The ordinary resin I use is a brand called Craft Resin, but there are now multiple types of it, so the one to go for is the food-safe 1:1 mix (mixed by volume rather than weight). If you warm both the resin and hardener before mixing and then mix them carefully (I use magnets through the bottom of the mixing pot for stirring to avoid breaking the surface). If you’re making jewellery and need to eliminate all bubbles, you can sit the mixed resin in a vacuum for a time to do that, but even without doing that you can reduce the bubbles to a few scattered microscopic ones per cubic centimetre, so it’s just a cosmetic issue when looking at close range. In the bore of an instrument, it would never make a detectable difference to the amount of sound absorbed.
“I’m trying to imagine what the behavior of the resin would be if your “tube” were an irregular piece of bamboo.”
It’s like creating artificial gravity, so a liquid will be pushed out in to the furthest places from the axle of rotation as those behave as maximally down. They fill up first, and if one side of the tube is further from the axle (metal rod) than the other side, that wider side will fill up more. The liquid will self-level to a cylindrical surface within the rotating tube. I’d still want to use reasonably straight bamboo with minimal conicity to avoid the instrument being excessively heavy, though the quenas I make entirely out of resin typically have 4 to 5 mm thick walls.
If the metal rod isn’t quite horizontal, I can’t predict what the result would be, and it could vary with spin rate. It might lead to a conical bore, but the diameter of the bore might not have a linear relationship to distance along the tube. Experiments would need to be done to test that, perhaps using water in a clear tube to see the resulting shape without wasting any materials.
“And of course this presumes that you have a good way to center the rod with the ends of the bamboo. And I’m curious as to how the resin would be distributed before starting the spinning process.”
You can centre it well enough by eye, but you might want it off centre at the ends to compensate for any bend in the bamboo tube. Because the craft resin flows with low viscosity to begin with, and particularly if you put it in while it’s still warm (and you could warm the tube to keep it warm longer), it will level out along the length of the tube once you’ve sealed the second end and then set it horizontal, though I’d tip that second end low for a couple of seconds to get it to spread that way faster. It’ll remain liquid for four to five hours while the viscosity gradually increases until it begins to solidify. After eight hours you can stop spinning it, but to avoid all risk of creases appearing in the surface, I’d keep it turning for ten hours, then leave it to cure for a few days before drilling any holes in it.
For spinning it, I wonder if you could just stick one end of the rod into a drill and set it running in a slow screwdriver mode. I might just use a drill chuck and find an old motor to turn it rather than risk wearing out a drill. It should only need to do a few revs per second.
Regarding the spinning resin casting of an irregular shaped piece of bamboo, it seems to me that you would end up with each piece having a different chimney height at the tone holes, since each piece would be a different shape, and hence would have different wall thickness of resin at the location of the tone holes. You’d have to somehow compensate for this by adjusting the size or location of the tone holes, so the approach would appear to fall a little short of the goal of producing regular sized flute bodies that allow accurate tuning through repeated use of the same measurements. Accurate tuning really needs some consistency in bore ID and wall thickness.
Regarding the PVC approach, where we can assume roughly consistent cylinders with roughly the same wall thickness, here you have the problem of still needing to do some kind of correction in the head in order to bring the upper second octave notes in tune. Something like a Fajardo wedge approach might help, but I’ve found that these often cause some loss of tone.
I kind of like the idea of exploring some kind of spinning resin approach as David Cooper outlined, but just for creating the wedge (or its acoustic equivalent – a small area of taper in the head). I bet that would work better than a simple wedge which seems to interfere with the airflow a bit.
Thanks so much.
I’ll give this a try tomorrow
This is super interesting. I’d love to try that UV resin at some point. I have another flute making friend who has talked about the Craft Resin, so I’m going to have to take a look at that. Mixing with magnets? How does that work?
As paddler says, the wall thickness irregularity might be an issue, but I expect it can be minimized in degree by straightening your bamboo and selecting stalks that are as round as possible. But I have some jigs and clamps that I use for heat-bending bamboo to make it straight, and it can make a big difference, especially when you don’t have the luxury of choosing optimal pieces of bamboo.
As for spinning, I recently acquired a small DC motor that can run anywhere from 1 to 7000 RPMs. I got a speed controller for it and a power converter for running it off AC. It would easily manage the spinning part with total control over your RPMs. Got all three for like $120. The rod can be held by a coupler to the shaft of the motor, and the other end of the rod can be held in some type of live-center mounted on a bench.
Now you have me so intrigued by this whole thing I’ve got to try it!
@toffle Doug Tipple gives detailed instructions and measurements for his D flute: https://tippleflutes.com/making-a-simple-irish-flute/ I have one of his flutes in F that seems to be made from schedule 40 3/4" pipe, so larger bore that what you have, but that may not be what he describes.
I have just put the measurements of my F into the Flutomat from archive.org and Bracker’s calculator. The hole position results are within 1mm of each other. They are within 3mm of the actual flute (maybe better - I only used a school ruler)
1 Like
And there you have it, a perfectly serviceable flute-shaped object of my own making. I’ll have to clean out the tone hole chimneys and polish it up a bit, but it works. Tuning does not carry across the octave for all pitches. The high C# is particularly bad. I’ll get closer next time.
I marked out the tone holes as suggested by Shephard, Tipple and Bracker, and drilled out the best compromise between the three.
As for diameter, I stopped when the fundamental was in tune. (I overshot the E)
All in all, I am encouraged by my results. It’s nothing I would choose to play in public for the time being, but as I said, serviceable.
Thank you to all who gave encouragement and advice. Your help is greatly appreciated. I will surely have further questions in the near future.
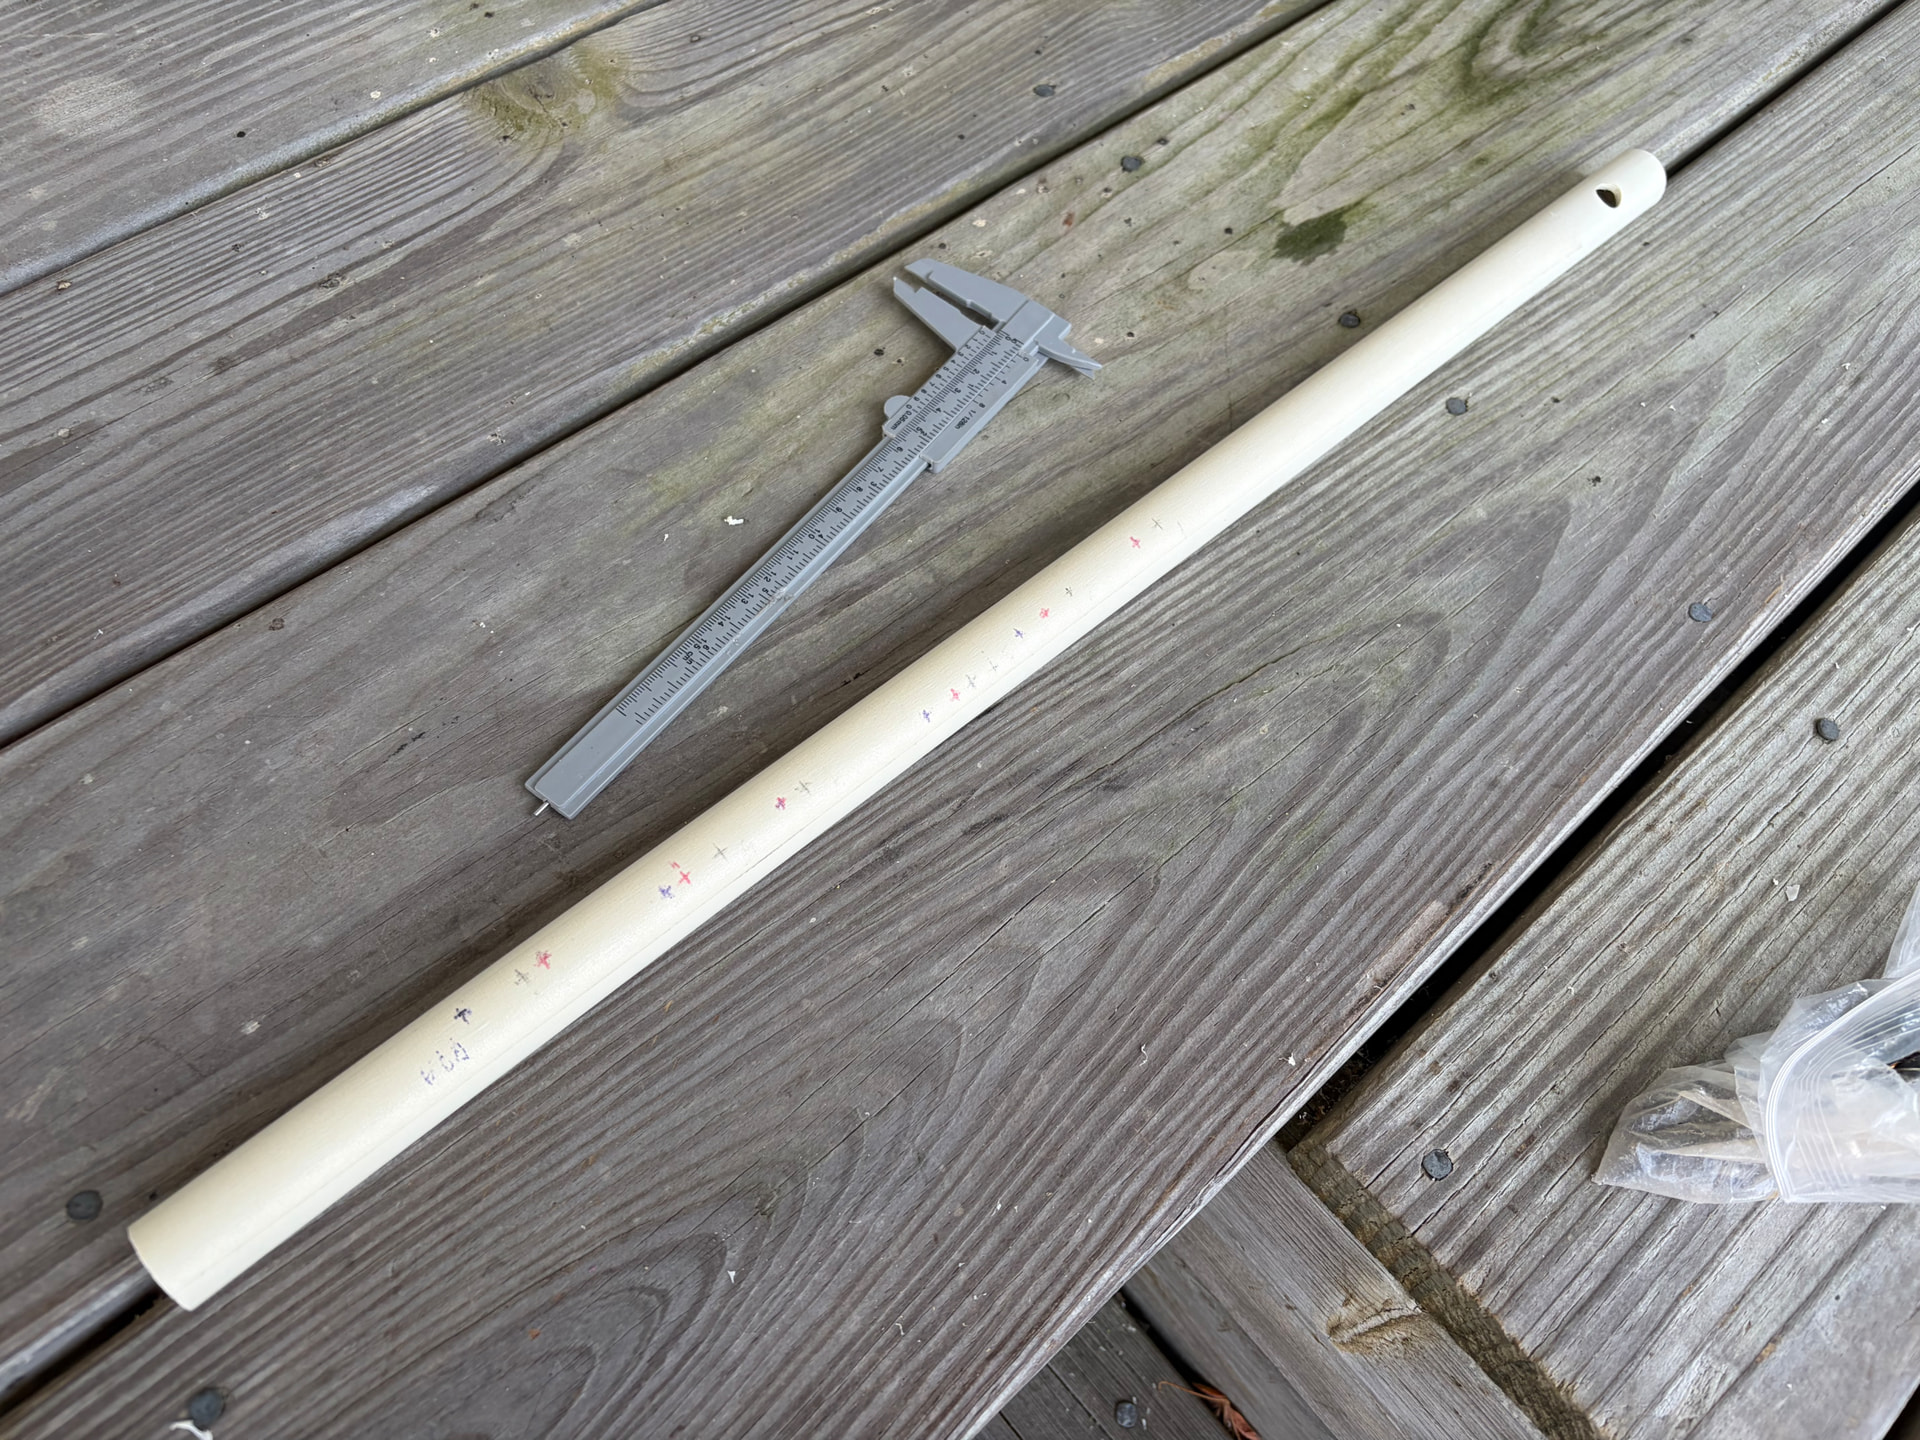
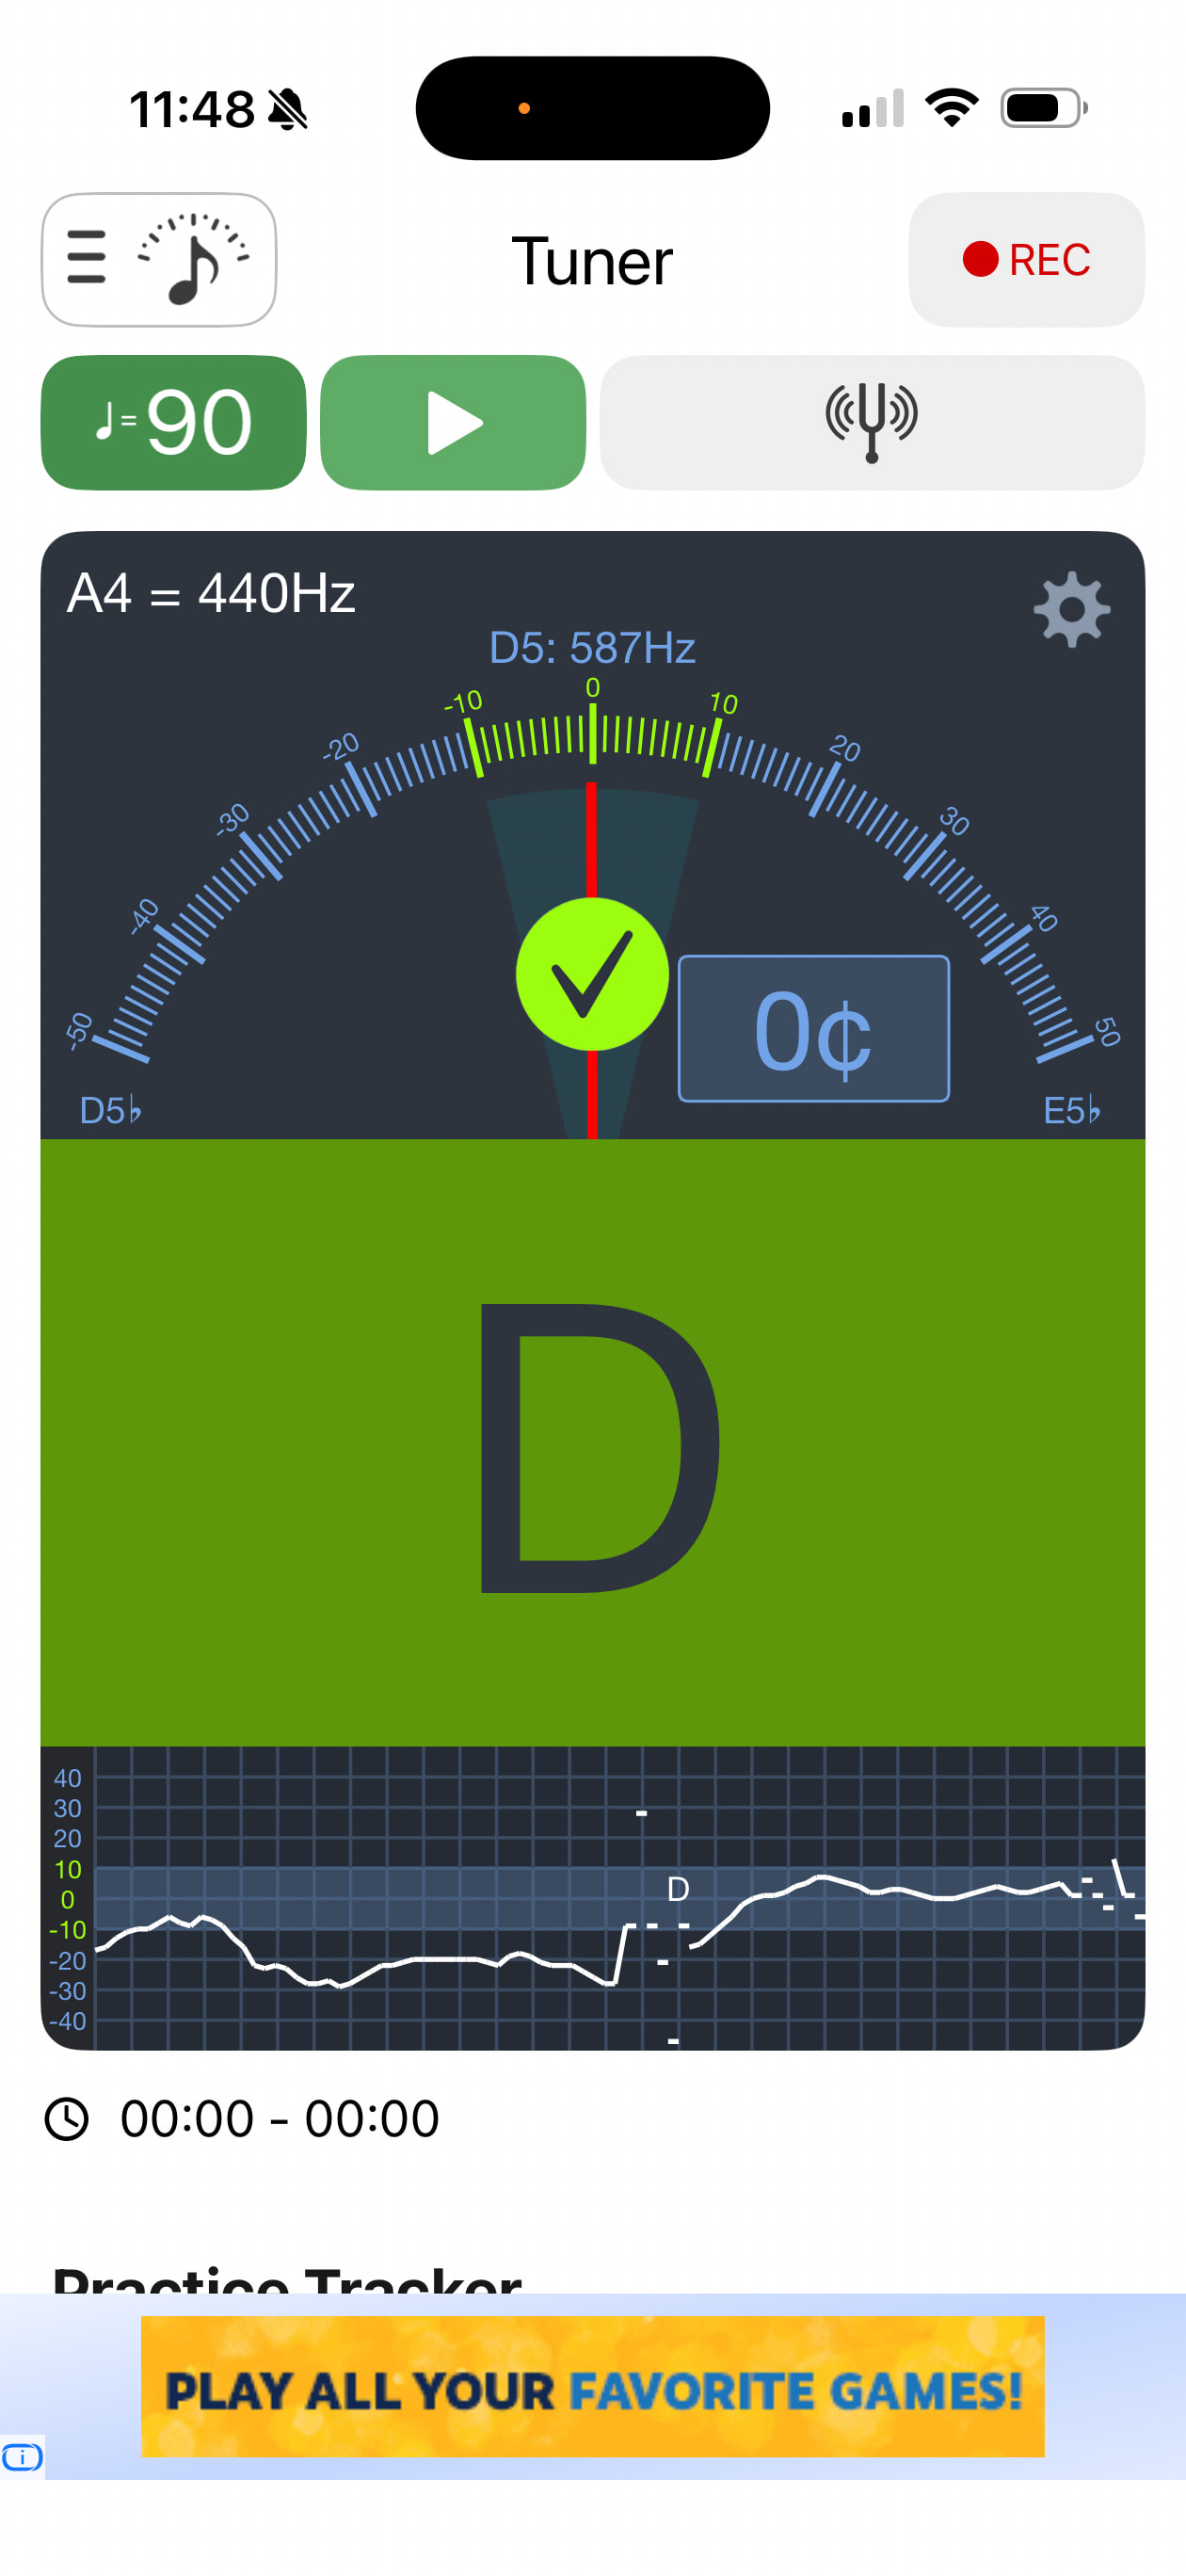
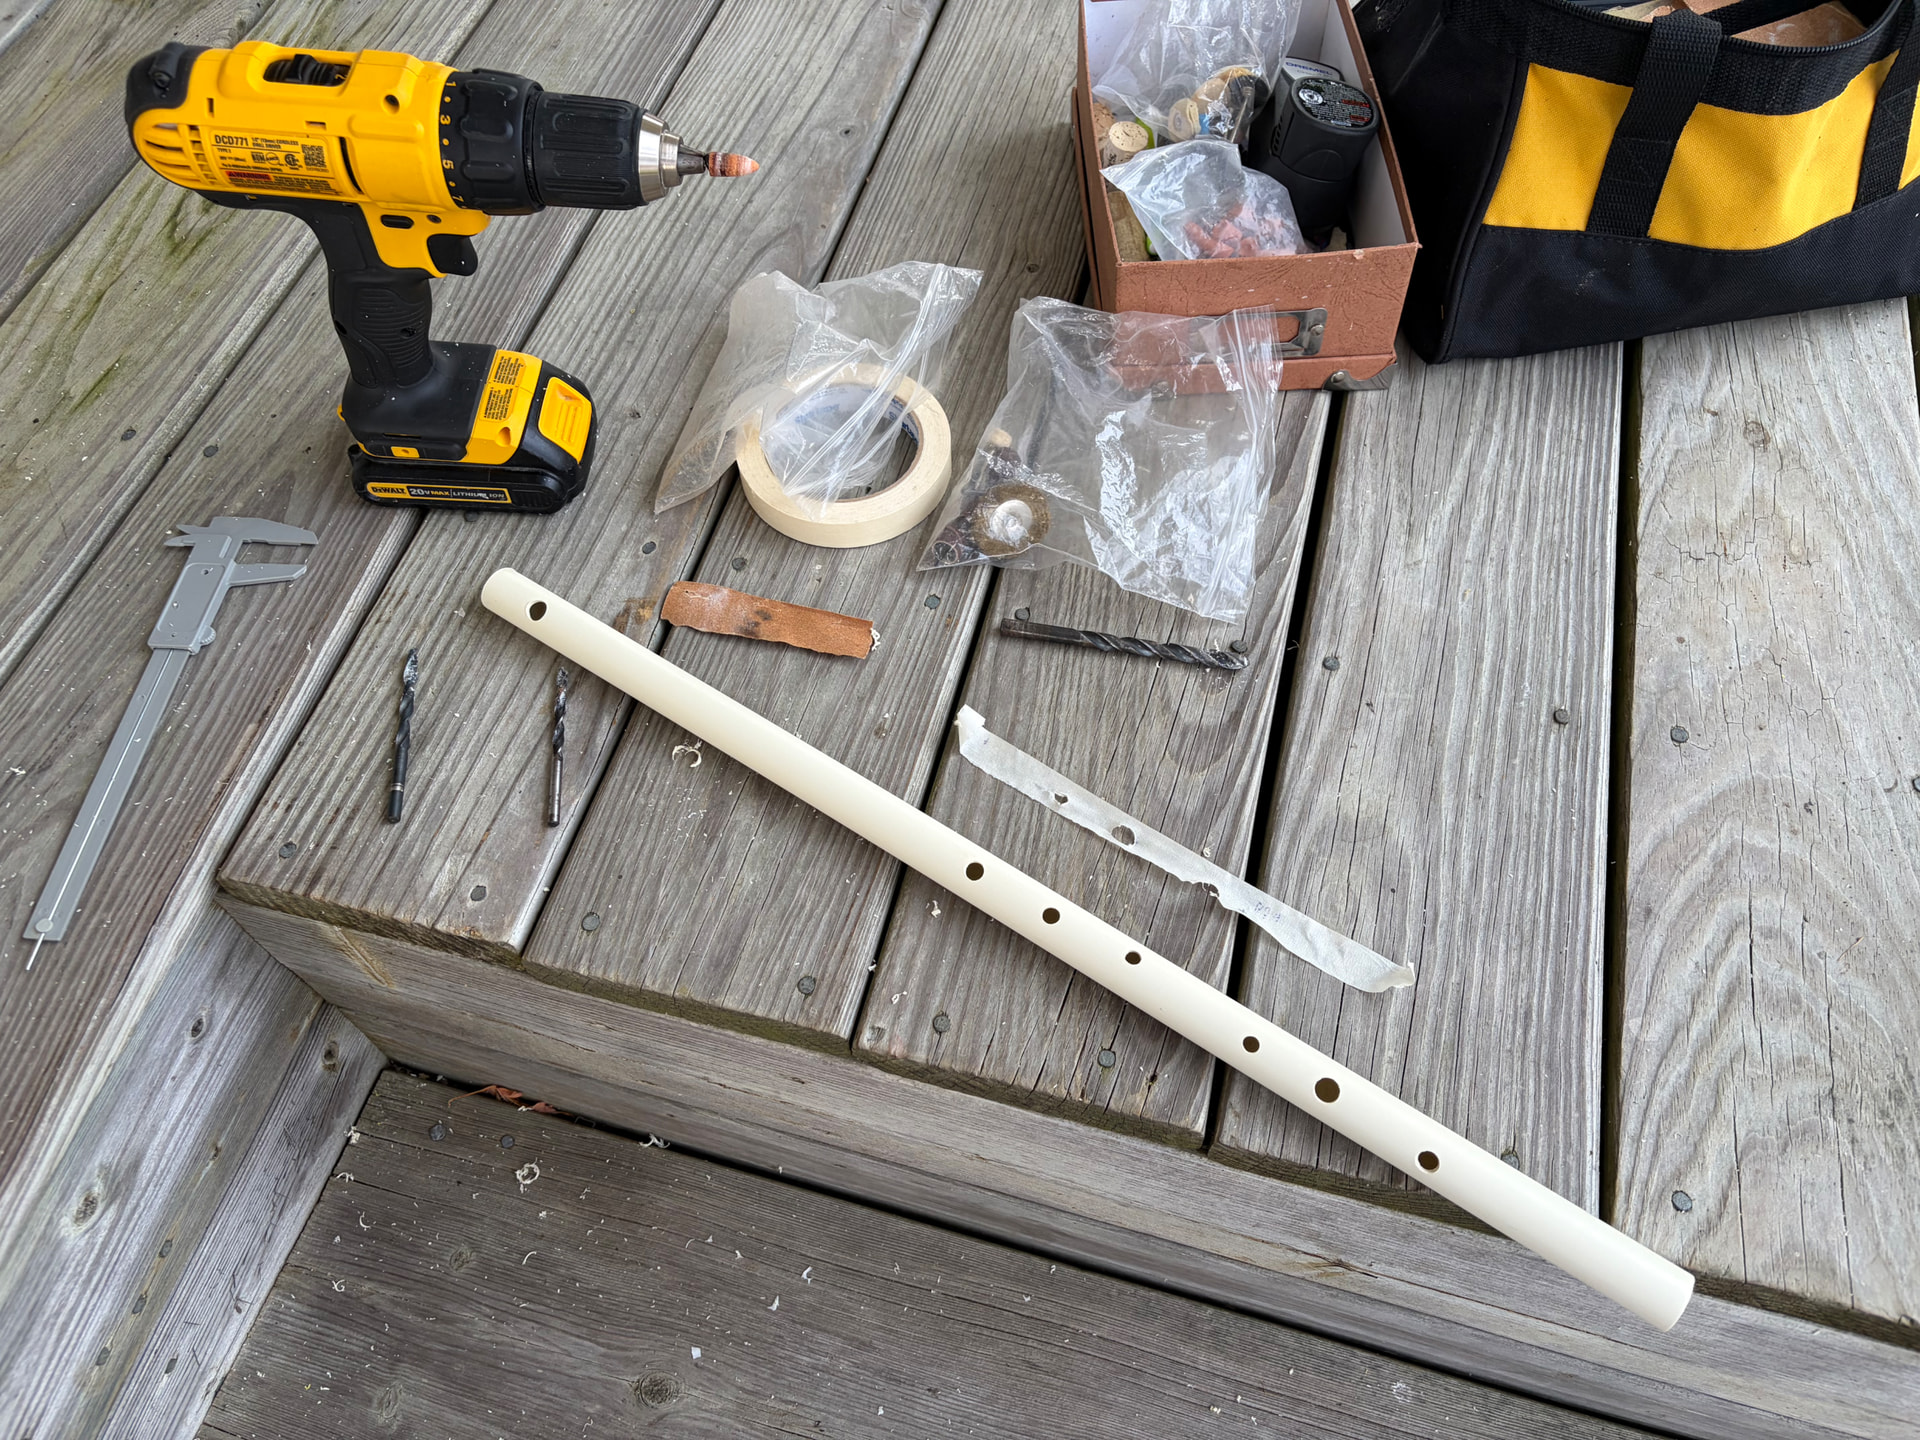
Looks good. I still haven’t got to the workbench on this. I’ve finished nosing in the code for the calculators though. My inclination is to favour the Bracker over Pete Kosel’s ‘original’ Flutomat. As of January this year Hans Bracker was still working on that whereas Flutomat from the archive.org is 15 years old so won’t have been tested on the latest browsers. It fails to calculate some values but I can’t see anything wrong with the code. Reading just the comprehensive plain English comments in the Flutomat page source gives a very good overview of the things that influence hole position.
My tactic at the moment is to use both and if they are different by more than a mm or so to sit back and check that every field on the Bracker one is what I intended.
1 Like
My tactic apparently is to overthink every aspect of the design and build until my head spins, and then grab my tools and dive in. I don’t want to lose sight of the fact that this is something I do for enjoyment.
Though I can hardly call these first efforts a smashing achievement, I’ve learned a few things already that I hope to avoid, account for, or apply in builds going forward.
- Bamboo singes under a drill or sanding bit, and PVC melts. The PVC is harder to clean up afterwards.
- Fine measurements of PVC can change with the temperature. I don’t know if that’s enough to affect the playing or intonation, but I found myself scribbling over (and over) subsequent measurements of inside/outside diameter or wall thickness.
- I don’t know how to read callipers in inches.
“…it seems to me that you would end up with each piece having a different chimney height at the tone holes … You’d have to somehow compensate for this by adjusting the size or location of the tone holes…”
You’d drill the holes one at a time in a standard place, though perhaps moved a little relative to the previous hole if that one was significantly out for any reason, each time making it undersize at first, then checking the tuning to determine whether to enlarge it all round or more to the south or north. You’d expect each bamboo flute to turn out a little different anyway.
“Regarding the PVC approach, where we can assume roughly consistent cylinders with roughly the same wall thickness, here you have the problem of still needing to do some kind of correction in the head in order to bring the upper second octave notes in tune. Something like a Fajardo wedge approach might help, but I’ve found that these often cause some loss of tone.”
For end-blown flutes and whistles a cylindrical bore works fine. For transverse flutes you have greater reason to make a separate head with tuning slide, and the bore of that could be made using a silicone bore mould, making the bore surface a little less perfect there, but that’s a tiny compromise for getting the tuning right. If you want to make a single-piece flute though, another option’s to use silicone bore mould for the head end first, and then to complete the rest of the bore lining afterwards by spinning the cylindrical part for the rest of the length. So, make the bore lining with resin that way, then make the blowhole, adjust tube length to tune bell note, then drill holes one by one and tune them approximately as you go, making more precise adjustments after all the holes are done and the flute’s volume (inner space, not loudness) is marginally increased by the chimneys.
“I’d love to try that UV resin at some point.”
I should have said, the thing to start with is a UV resin glue kit with a UV torch that puts out the right frequency for curing resin. The istoyo brand is good. No one seems to sell UV resin glue in anything other than those starter packs with a torch, but Frension UV resin is the closest to it, having similar viscosity and rapid cure times.
“Mixing with magnets? How does that work?”
A stack of small neodymium magnets arranged like a stick. Put some inside the pot and some underneath. Move the ones underneath and the ones inside the pot move like a stirring stick, but without breaking the surface to drag air in. You only need one small bubble of air to get in and for that to be broken up by stirring to end up with thousands of tiny bubbles all through the resin, and the tiny ones don’t move up to the surface to burst there in the way that bigger bubbles do, so you want to avoid making them in the first place.
“As for spinning…”
Sounds like a good plan. I don’t know if vibration from uneven mass distribution will be a problem, but if you put rubber bands round the tube you can quickly stick something like pens through them to make balance adjustments until it runs smoothly. You can test that with the tube dry. Once attempting it with resin in it, that’ll be off balance initially, so a motor that can be started slow and then speeded up once the distribution’s even would be best.
Warning: Craft Resin’s non-toxic, but it does put out vapour that people can become allergic to if they’re exposed to it too often. Not a big issue with curing some inside a sealed tube, but always work with good ventilation.
Note: the brand Mouldd has a resin with the exact same properties as Craft Resin, so it’s almost certainly the same stuff from China put out under a different name.
Another warning:-
If working with UV resin, a UV torch/lamp could damage your eyes, so wear sunglasses with 100% UV protection. It’s easy to test their protectiveness because all you have to do is look around with the UV light for fluorescent objects and then put the glasses in front of one and shine the UV light at it again to see if the UV light is still reaching the object. Don’t use the UV light close to the glasses as it could damage them.
And another thought:-
It may be necessary to leave a tiny pinhole through the UV resin plug at one end by the axle rod for pressure equalisation. The resin in the tube will generate heat as it cures, and the heat coming out of it varies over time.
These are good tips! Thanks!
A little update on my flute making journey.
I had a passable PVC flute in D… until I decided to tweak the embouchure. That went downhill very quickly, and I ended up with an essentially unplayable piece of pipe. Rather than bin the whole thing, I trimmed the end and made a new embouchure hole, leaving me with somewhat less impressive flute in Eb. It actually plays fairly well, and most of the notes are fairly close to being in tune… except C# and C-nat. (I imagine that by shortening the tube by well over an inch, I have made the first tone hole proportionally much closer than the other holes?) I have somewhat remedied this by partially covering the first finger hole with electrical tape.
In one sense, I have achieved one of my goals. I’ve been able to bring my flute to my workplace without fear of it being damaged by the wide swings in humidity and temperature.
I find that the flute is considerably quieter than my wooden flutes, it is not as resonant, and ornaments and articulations are not as crisp as my other instruments as well. Perhaps these are common characteristics of cylindrical PVC flutes.
All this to say I’ll be making another PVC Flute in D in the very near future. My goal for my next instrument is make something that plays better in tune, with more volume, and hopefully with more ergonomic finger spacing. I find I can almost play with standard/classical grip, but my right hand 3rd finger is just a little out of reach. I’d be very grateful for any tips in this regard. I play classical grip on my other instruments, so it would be preferable to do the same on this flute.
Cheers,
Tom
I have now measured a dozen cylindrical flutes and whistles more carefully and compared them with the calculators. The measurements of ones that I find easiest to play in tune in the first octave all lie very close to the Flutomat results. The flute I find hardest has some big discrepancies.
So for a D flute I see no reason not to start off putting the Tipple suggestions into the Bracker calculator and enter the R3 (and probably L3) with smaller diameters until reachable. I think wooden flute makers aiming for a small reach juggle around with all the hole sizes/postions to improve the scale and second octave but the Tipple flutes seem to work OK with no major changes - though I’m sure he does apply some magic based on his experience.
The main tricky bit wihout a tuning slide looks to be the embouchure position. Starting off with a ‘blank’ tube slightly flat seems safest but then we know the hole positions from the end are not quite right and have to sort it out as we gradually make them bigger. I can see how we might calculate a way out of this. But I’ll try it first - after the days get shorter.
I’ve been playing around with these numbers. It seems to make sense on paper, but so far I have not been able to get the hole sizes right on the tubing. I’m so tantalizingly close.
I taught high school music for over 30 years. I used to tell the kids that sometimes you don’t get things the first 500 times you try. I’m trying to listen to my own advice.
I’m fairly sure I won’t make the reach on a cylindrical D but I’m hoping for an Eb. However what I am trying to replace first are whistles in A, Bb and C which I use occasionally (‘world’ and Christmas carols etc rather than Irish) and would use more if they were flutes.
My main flute is small handed and unsatisfying (for me anyway) much away from one or two sharps over two octaves. So I want to embrace the diatonic.
That the Tipple G and an @jemtheflute high D work well and are close to the numbers on paper give me hope that I can crack the ones in between. I’ll tackle those with ergonomic issues later.
1 Like
At this point, I’ve sacrificed a few lengths of PVC pipe and I’m more or less familiar with some of the basics of building a cylindrical flute. There are some intangibles that I am not quite getting, like how two embouchures that look identical to my eye can respond so differently. Maybe it’s like making beer, where you have to walk backwards through the brewery three times before mashing in the grains. (Or else…) Another thing is that the real world finger hole sizes are not matching the ones predicted in the calculators. What I’ve been doing so far is to work my way up the flute, sizing/tuning the notes as I go. That works… kinda.
My real issue right now is getting a C-natural that plays in tune. Using the method above, I can get the diatonic notes to sound in tune, including the C#, but when I try a C-natural, it is jarringly sharp. To me this means I want the L-1 hole to be smaller, which means I have to abandon the predicted hole position or the C# won’t be in tune.
Have I got this wrong? (Well, obviously I’ve got SOMETHING wrong)
Tom
Tom, your C# and C natural cannot both be in tune no matter what you do. It’s one or the other. If your C# is in good tune, your Cnat is going to be very sharp. Most often there is a degree of compromise and the C# is tuned flat enough that the Cnat can be controlled by lipping down, and the the C# can be lipped up. So each note is close, but not perfect. No amount of changing hole sizes or positions is going to make both of these notes work.
Earlier you spoke of shortening your D flute in order to salvage it, making it into an Eflat. Bear in mind that your tuning issues will not improve in such a case, depending upon the diameter of the pipe you are using for your D. If you are making a cylindrical bore flute in D, you are probably going to want to keep the inside diameter of the pipe at 19mm or less if you can. If it is wider than that, your intonation will suffer. If you have a pipe diameter that is optimal for a D, it won’t be as optimal for an Eflat, because when you shorten the bore you change the aspect ratio. Shorter, wider bores make second octave tuning more challenging (i.e. flatter in relation to the first octave). This is not necessarily a deal breaker. A 19mm pipe can be made to work pretty well for both a D and Eflat, and if you are working with PVC, it’s not as though there is an 18.5mm option (for example). So it can work with both keys, but the second octave on the Eflat might need some tweaking to be in better balance.
1 Like
Thanks Geoffrey.
I suppose it’s time to cut another blank and try again, being a little more conservative with the C/C# tuning. The good news is that apart from hole L1, I’ve got a pretty good template of a working flute. I have a newfound respect for makers who can cut that last hole without wasting a day’s effort
The inside diameter of the pipe I’m using is 17.7mm. Bracker suggests that the optimal is 23, so that is a bit of a mystery. (It’s what I have so I’m not going to lose sleep over it)
I asked google about upper octave tuning. The AI assistant mentioned adding a wedge or a restrictor ring near the end stopper. I’d be willing to try either of these to bring the upper octave up to pitch without over blowing. Thoughts?
Cheers,
Tom